I’m constantly telling my clients to eat whole foods and if necessary, because of busy modern lifestyles, to incorporate them into their lives in the most simple of ways. There is a foodie in me that loves to make delicious, indulgent, gourmet, everybody-is-going-to-rave-about-this food and then there is the healthy-minded practical side of me that knows that EVERY meal cannot be AMAZING, and that if I want to take care of myself and feel good, I just need to be open to eating whole, minimally-prepped, simple food, especially when I’m busy and don’t have time to cook.
Enter the “snacks-as-a-meal” approach. Sometimes we forget that a handful of nuts, an apple, a carrot, dollop of hummus, and hard boiled egg are sufficient for lunch. You could probably even skip the hard boiled egg and you’d be fine til about 3:30pm when you might need another snack. This is the reality of many of our days. We are busy people, many of us moving from one place to another during the day. Or, even if we’re sitting at our desk for much of the day (get up and take a walk!), the truth is we may not have leftovers for lunch, and will need to have thrown something together quickly that morning before leaving for work.
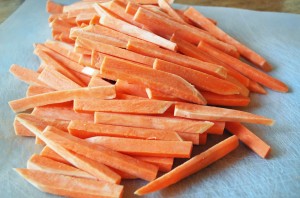
I like to remind myself and my clients of the world of whole foods available to us that can be eaten and enjoyed with minimal cooking or preparation. For example, did you know you can peel and cut up a sweet potato and eat it raw? With a taste similar to raw carrots, I have put these on a vegetable tray at a get-together with not a soul knowing the difference. Throw some of these babies in a zip-lock baggie, grab that tub of hummus, a kiwi, some raw trail mix, and a small piece of high-quality cheese and you’re set for lunch. Really.
This approach may not be sexy, but a lot of satisfaction can come from reminding yourself of what these whole foods taste like in their natural state.
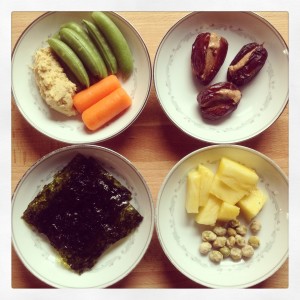
Here are some other snack ideas: sugar snap peas with Trader Joe’s horseradish hummus (delicious!), dates stuffed with Good Life Almond Butter (the best almond butter out there!), fresh pineapple chunks (cut up and enjoy one of nature’s most glorious fruits) in combination with wasabi peas, and nori seaweed snacks (see recipe below).
A little more about seaweed….
Seaweeds are some of the heathiest foods on the planet. Sea vegetables are a complete protein source and one of nature’s richest sources of vegetable protein (up to 38%) and vitamin B12. Quite simply, they are super foods and so good for us. All of us could benefit from incorporating them into our diet more often, and vegetarians and vegans will want to especially make the exploration of seaweeds a priority.
I throw seaweed into smoothies, eat sushi (love), miso/wakame soup, and make the occasional seaweed salad recipe. But, sometimes it’s a challenge to eat it regularly and a package of nori lies forgotten in my cupboards for months.
How to get seaweed into your diet on a more regular basis? The seaweed snack! Asian stores and Whole Foods have delicious little light, crispy, salty and oily seaweed snacks. While super yummy, sometimes the oil in these snacks isn’t very healthy, being of the refined “vegetable oil” variety.
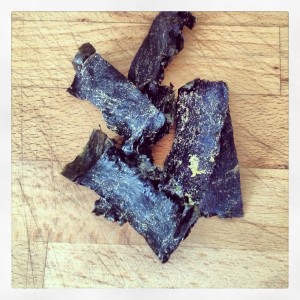
The other day it finally occurred to me, why don’t I just make my own? I have nori in my cupboard right this minute. Thirty minutes later I had these little crisp wasabi seaweed snacks in my mouth.
The equivalent of three sheets of nori was gone in the next 15 minutes. I couldn’t stop eating them and it was only 10am. These are super, and I mean SUPER easy. And they are addictive. Here’s the recipe found on TheKitchn.com (if you want to visit the site directly):
Wasabi-Toasted Nori Crisps
Makes about 60 crisps
1/4 cup water
2 tablespoons powdered horseradish wasabi
10 sheets nori
Real sea salt (pink or grey in color)
Heat oven to 250°F. (note: I thought 300/350 was a better temp)
Combine the water and the wasabi in a small bowl and whisk with a fork until the wasabi is dissolved. The wasabi tends to settle to the bottom, so you may need to re-whisk between batches.
Take one sheet of nori and fold it in half. Unfold it and lightly paint half the sheet with the wasabi water using a pastry brush. Sprinkle the inside with salt and press it closed. Lightly brush the top with wasabi water, as well (but do not salt). Using a sharp knife, cut the nori into six strips and transfer them to a baking sheet.
Repeat this process with each sheet of nori until you have filled the baking sheet. Strips can be close to each other, but should be in a single layer without touching. Bake for 10-13 minutes, until darkened, dry to the touch, and brittle. Transfer the nori crisps to a cooling rack to finish crisping. Repeat with any remaining sheets of nori.


